Want some event photography tips? You are at the right place.
Photographing events such as weddings, concerts and corporate events can be challenging for beginner photographers. Poor lighting, constantly moving subjects and unpredictable moments are all part of the events that can make your work really demanding.
Learning new technics will make your photography work easy and enjoyable. The following event photography tips will make your life easy as an aspiring event photographer.
1. Select the right camera for the event
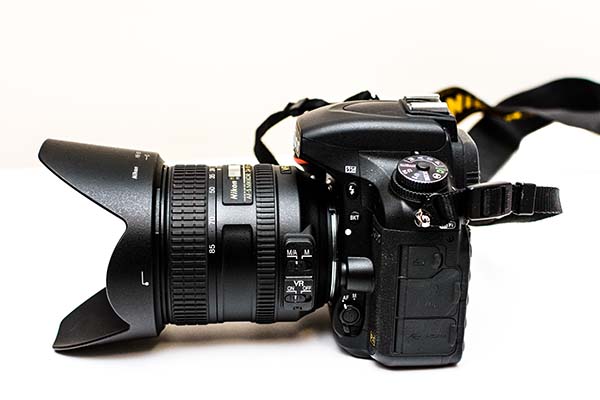
Using the right camera is important when you photographing in challenging conditions. A full-frame DSLR or mirrorless camera is the best choice for event photography.
They are excellent in low light and they have many features that you will need when you photographing important events. For example, having a dual memory card slot, full manual control, and fast autofocus.
Cameras like Nikon D850, Nikon D750, Canon EOS 5D Mark IV, Sony a7S II are good choices.
Don’t have a full-frame camera?
Don’t worry. Still, you can do event photography with a crop sensor APSC camera that you already have. You don’t need to buy a new camera unless it is absolutely necessary.
I photographed many events with my Nikon D7200 APSC camera paired with Nikon 35mm 1.8G lens. It is great in low-light and it has two memory card slots.
Point and shoot cameras are not suitable for event photography.
Related: Low light photography tips.
2. Choose the right lenses
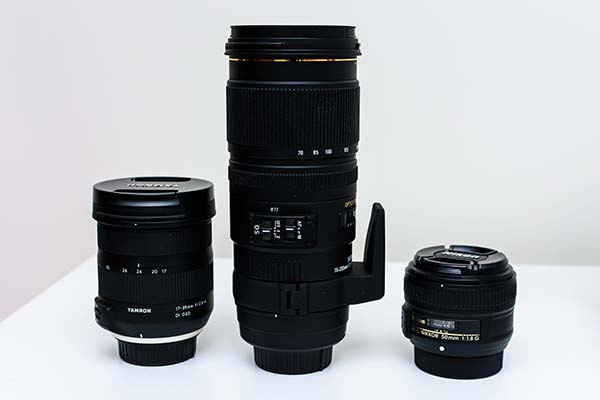
A fast standard zoom lens such as a 24-70mm f2.8 lens is the best lens for event photography. It is a versatile and sharp lens that will produce outstanding images.
The focal length range is ideal for indoor events. You can use the wide end of the zoom to take group shots and zoom in all the way to 70mm to take individual portraits.
All the big camera brands have a professional 24-70mm f2.8 lens. However, they are super expensive and heavy.
You can go for a third-party option such as a Tamron or Sigma lens. They are cheaper and produce comparably sharper images.
If you want more reach, you can go for a 70-200mm f2.8 lens.
You have another great option in the lens choice, which is a 24-105mm f4 or 24-140 f4 zoom lens.
For cropped sensor cameras, a 17-55mm f2.8 lens is the best choice.
If you love photographing with prime lenses, you have many great options. If you are going to use only one lens, you should go for a 50mm lens on a full-frame camera or a 35mm lens on a crop sensor camera.
I photographed many events using only the Nikon 50mm f1.8 lens. It is light-weight, sharp, and great in low light. It is an affordable lens that you can buy brand new for less than $200.
If you are going to use two full-frame cameras, a 35mm and an 85mm prime lens are the best choices.
3. Don’t forget the flash
Most indoor events are poorly lit. Brightening the scene with a flash is a logical choice in many situations. You should check with the event organizers before deciding on using flash as some venues don’t allow flash photography.
Having the flash on-camera and bouncing the light on to the ceiling or a wall is the go-to method. It is convenient and gives clean images. If you use direct flash on people’s faces, you will get ugly washout images that your clients don’t want to see.
You can use an on-camera flash diffuser to get more pleasing images. I would recommend the Gary Fong Collapsible Light Sphere.
Many professional photographers use off-camera flashes with remote triggers. However, it is a complex and difficult task if you are a beginner.
The best flash setting for event photography is TTL with flash exposure compensation.
Read more about TTL flash here.
4. Best camera settings for event photography
Getting your camera setting wright is important in event photography. You don’t want to ruin the images of an important event.
For beginners, aperture priority mode is the recommended shooting mode for event photography.
Set your camera in aperture priority mode (aperture value mode for Canon users), set the minimum shutter speed to 1/160 S, Auto ISO, and Auto wite balance.
If you don’t know how to set the minimum shutter with auto ISO sensitivity, read my article here.
Set the metering mode to evaluative metering, and focusing mode to single point autofocus.
If you are going to use flash, set the camera to manual mode. Use a shutter speed of 1/160 S, ISO 800-3200 (not auto).
The aperture setting depends on the scene that you are shooting. For individual portraits, you can use an aperture value of f1.8 to 2.8, for couples f4, for group shots f5.6 – f8.
Use the viewfinder in your camera to compose and shoot. It is quick and easy. I don’t recommend using the live view for serious event photography.
Related: Viewfinder vs Live View in DSLR photography.
5. Take backup gear with you
Having backup gear is recommended if you are shooting an important event such as a wedding. You should have at least a spare camera body, a lens, and a flash for backup.
The backup gear doesn’t need to be expensive. I use a Nikon D7200 crop sensor camera, a Nikon 35mm f 1.8G DX lens and a Nikon SB 500 flash as back up.
6. Prepare and organize your event photography gear
You should prepare and organize your photography gear at least a day before the event. The following list will give you an idea about this.
- Clean your camera body.
- Clean your lenses.
- Charge the camera batteries.
- Charge the flash batteries.
- Set the camera to desired settings.
- Format the memory cards.
- Take a few shots to check if everything works properly.
- Check if you have all the photography accessories including chargers for the cameras and flash batteries.
- Pack everything in your camera bag.
Having an event photography gear checklist will help you better organize your gear.
7. You are allowed to chimp
Chimping is the habit of looking at the picture on the LCD after taking a photograph. It allows us to check the histogram and adjust the exposure. It also helps find out if your camera settings are horribly wrong.
However, looking at every picture on the LCD screen should be avoided. It is not necessary, doesn’t look professional, and wastes a lot of valuable time. You will miss important moments while looking at the screen.
If you change your camera settings while shooting, then you should check the image to find out if the settings are right.
8. Scout the venue before the event
Having prior knowledge about the event venue will help you a lot on the day of the photoshoot. Visit the venue before the event and check for the following things.
- The time taken for your travel, and traffic conditions.
- The size of the venue and seating arrangement.
- The lighting conditions ( natural window light, fluorescent lights, incandescent lights, etc)
- The nature of the ceiling and walls. You should look for the color, high or low ceiling. It will help to decide whether you can use bounce flash or not.
9. Talk to the event organizer about the details
You should get the following details from the event organizers.
- The timeline of the event in writing.
- Who are the important people attending the event? You don’t want to miss photographing them.
- What are the important moments that you shouldn’t miss?
- Do they want any specific type of photographs? For example, a group photo of all the attendees that maybe 40 or 50.
- Is flash photography allowed?
- How the images will be used (large prints, album, website, social media).
10. Have a clear contract
The purpose of having a contract with your client is to clearly set the rules of engagement, which is acceptable by both parties. A clearly written contract will eliminate most possible miscommunications between you and the client.
You can find a photography contract template here.
11. Use the rehearsal to get more ideas
Some stage events have dress rehearsal days. Visiting the rehearsal and taking some test shots is a great way of minimizing surprises on the actual photoshoot. It is a great place to learn lots of photography tricks.
12. Take plenty of memory cards
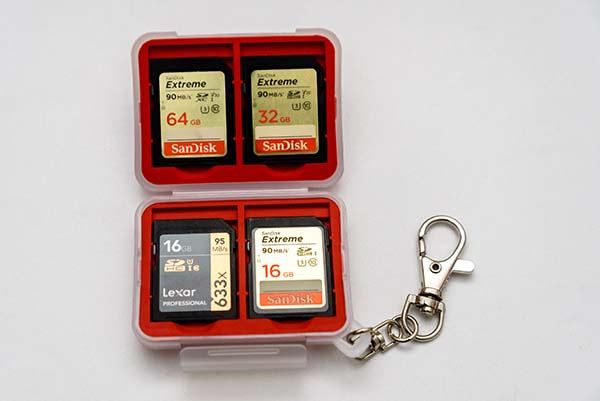
You will need plenty of fast memory cards for your camera to take thousands of photographs on the day. Don’t be surprised by the numbers. You need to take at least a thousand photographs at an average wedding.
I shot 3820 images in a stage event that lasted for 6 hours. I usually carry four 64GB and four 32GB Sandisk Extreme SDHC memory cards. They are reliable and fast enough to take RAW images.
13. Extra batteries are mandatory
Don’t have an extra battery for your camera? Then don’t try to do event photography business.
Even if you are going to photograph your friend’s budget wedding for free, still you need at least an extra battery for your camera.
Having spare batteries for your camera and flash is mandatory. You can’t quickly charge your batteries at the event if they go flat.
Related: Caring your camera’s Lithium-ion battery.
14. Have a photography assistant or second shooter
When photographing larger events, having an assistant or a second shooter will give you many benefits. It is particularly helpful when photographing weddings.
You can get images from different angles at the same time. In addition, you will have less stress and more freedom when you have an assistant.
If you are a beginner, start shooting as a second photographer. In that way, you can learn new technics from the main photographer who is more experienced than you.
15. Have appropriate insurance that covers event photography
There are two types of insurance policies you will need if you do event photography business.
One is photography equipment insurance that will cover your expensive camera, lenses, and accessories.
The second one is a public liability cover. It will cover you for legal liability for third party property damage and/or bodily injury arising from your business activities as a photographer.
16. Wear appropriate dress
You should wear a dress that is appropriate for the event. Check the dress code with the event organizers. You can wear the same type of dress as the event guests.
Wearing a T-shirt and Jeans is not appropriate for a formal event. You can wear a dress with your photography business name and logo if you have one.
17. Go to the venue at least 30 minutes before the starting time of the event
Going to the venue early will give you many benefits. You can better plan your photo shoot, take photos of the table arrangement and decorations before the arrival of the guests.
If you are not on time, you will be stressed and will miss important shots.
18. Don’t try your new photography gear on that day
Never try your new gear on the day of photographing an event. They may not work properly, you may not know where the controls are and how to use them properly.
You should have at least a week of experience using your new gear before using them on an important event. If you are hiring photography equipment, you should get them a few days early and get familiar with them.
19. Shoot in RAW + JPEG
Taking photos in the RAW format will give you more latitude when you edit them. You can correct exposure and white balance, and reduce noise in post-production.
If your camera has dual memory card slots, set one to record the RAW file and the other one to record JPEG.
The JPEG files serve as a backup. In addition, if your client wants some images to post on social media on the day of the event, you can give some straight from your camera.
Keep in mind that RAW files take lots of memory, you will need plenty of storage capacity in the memory cards.
20. Use the silent mode in your camera
Many professional digital cameras have a silent shooting mode. If your camera has, enable it. It will reduce the shutter click sound which will be annoying in a completely silent room.
In addition, switch off the focus beep in your camera.
21. Shoot the venue in and out
Taking some establishing shots that tell the story of the event is important. You shout photograph the exterior view of the building, the main entrance, and signboards.
You should photograph the interior decorations, seating, and table arrangements.
Your images should tell the story about the size, beauty, and luxuriousness of the venue. Your clients (and the venue owner) will love those images.
22. Don’t forget to photograph the details
Take enough photographs of details such as wedding rings, flowers, wine glasses, invitation cards, jewelry, and table decor.
Having a macro lens will help you a lot in this situation.
23. Don’t be the hero of the event
You are not the hero of the event, you are there to capture important moments without distracting others.
Don’t run around too much and make noise. Be calm and don’t create any dramas. Don’t confront anybody.
Just mingle with the gusts and do your job.
24. Don’t be too creative
Your job is to document the event. Don’t be too creative and make laughable images.
Your images should accurately represent the event.
25. Watch for candid moments
Candid photography is all about capturing unplanned moments of someone’s emotions such as joy, surprise, and tears. Watch for those moments and take images without disturbing them.
Candid images are powerful and tell the true story of the event.
26. Don’t miss key moments
Events have some key moments that you should never miss to photograph. The first look, walking down the aisle, and first kiss are some of the key moments in a wedding.
27. Take a variety of shots
Take a variety of images with different focal lengths, different angles, and different aperture settings.
For example:
- Wide-angle shots that include many people
- Close up portraits of important people
- Macro shots of details
- Group portraits
- Couples portraits
- Headshots
- Shots with a shallow depth of field
- Low angle, eye level, and high angle shots
28. Always edit your images
Event photography is not like shooting in ideal conditions such as in a studio. Your images will have some flaws such as wrong white balance, too much noise, and poor composition.
You should edit your images to correct these imperfections. You can use Adobe Lightroom or similar software to edit your images. I have already mentioned that shooting in RAW format will give you more room when editing your images.
29. Deliver the images on time
The final part of the event photography is delivering the images to your client. It is important to give the images on time as agreed in the contract.
Clients don’t want to wait for weeks or months to get their images.
About the author: Victor is a freelance photographer, technophile, and founder of vxanswers.com.